Table Of Content
Continue to do this all the way around the edge of the pie crust. I should’ve gotten closer to the Pecan Pie so you can really see how flaky and delicate that pie crust is! You’ll get a good look in the Pumpkin Pie and Pecan Pie recipe videos though. Similar to the fork crimping technique, this one is all about a spoon! Starting from the outside of the pie, use the edge of an upside-down floured spoon to press a semi-circular shape into the dough, all around the pie. This is one of the easiest ways to level up your pie.
Easy Pie Crust
Brush with egg wash and sprinkle with sparkling sugar for a little extra glitz, if desired. There are many ways you can switch up your lattice to make the design your own. One of the simplest is to ditch the evenly sized strips and cut your dough into a variety of widths, alternating between narrow and wide. This creates a unique pattern you can weave in many different ways. Cut a 6x12-inch rectangle of dough crosswise into four 3x6-inch rectangles. Cut rectangles in half diagonally to form 8 triangles, then cut 2 of them into smaller triangles and shards.
Free Recipe eBooks
The Weird Way People Are Using Aldi's Pie Crust - Mashed
The Weird Way People Are Using Aldi's Pie Crust.
Posted: Sat, 19 Jun 2021 07:00:00 GMT [source]
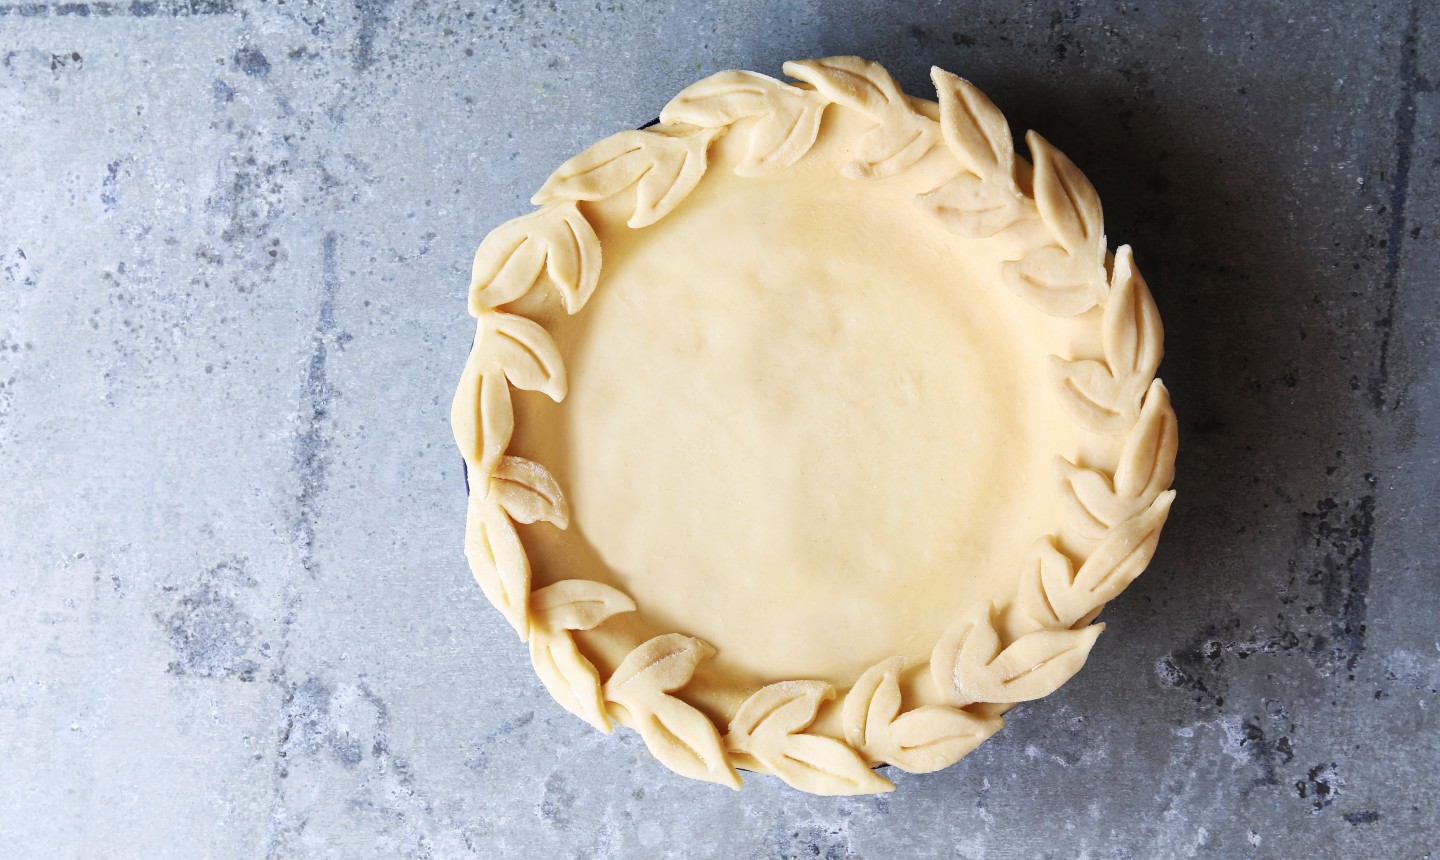
There are not a lot of details on the how to parts. For instance, the pumpkin pie with the leaves on the edge - says to cut out @65 leaves and cook them separately. Do they just stay on the edge - no slipping around?
Recipe Notes:
And I am guessing regarding cooking (6-8 minutes) that it is at the same temperature as the pie? The cut out stem design gives a vent to the apple pie filling center and the hand painted leaves bring the color of autumn to the Thanksgiving table. Decorative pie crust edges take any pie to the next level. In this design, the process of lattice work and braiding are combined for a really intricate look. Lattice pie crusts can have the strips simply overlapping each other in opposite directions, or interwoven for a more intricate effect. There is nothing more old fashioned than a freshly baked pie with a lattice top crust.
Lattice Pie Crust
This crimp is popular for a reason—it's classic and beautiful! Starting on the outside edge of the crust, use your thumb and index finger to gently pinch a portion of the dough into a soft "V" shape. With those fingers still in place, use a finger from the opposite hand to gently press the center of the "V." You can make the crimps as wide or as thin as you like. Continue around the edges until the entire crust is crimped. Once you've placed the crust in the pie plate and crimped it, pop the crust back into the fridge for an hour or freezer for 30 minutes once more before baking. This will give the butter a chance to firm up yielding a structured, flaky dough.
Pastry Cutout
For an alternative to an intricately cut top crust, mimick a lattice pattern in crumbly shortbread crust that's sprinkled on top. It's an easy, no-fuss design that goes well with this low-maintenance sheet-pan linzer pie. How about a special pie decorated with apple crusts for Teacher Day?
Easy Pie Crust Designs That Won't Drive You Nuts
A diamond pie crust design is a decorative pattern made by interlocking diamond shapes. Apple pie with a lattice crust apple pie is a traditional dessert with a sweet, delicate filling flavored with cinnamon and nutmeg. Pie, a delightful and versatile dessert, has been enjoyed by people across cultures and generations. In a typical Homemade pie you encase filling in a well-crafted pie crust. The most creative part of making a pie from scratch, especially with a family recipe is to decorate the pie crust with artistic designs. Decide to start with a little pie refresher course beforehand?

Use a leaf cookie cutter to create small and large pie petals and arrange them atop the chocolate-cherry filling. See additional pie designs in our posts How to weave a quilted pie crust and Decorative pie crust tips. Just about any pie crust recipe can be used to make a lattice.
Gives the top a lovely sweet crunch and looks pretty, too. The pie dough discs need to chill for at least a couple hours, so I always make them a day ahead. The pie crust designs on this page look pretty and professional because I’ve practiced so much over the years. We all have to start somewhere, and work our way up to artistic pie masterpieces. All you need is the willingness to practice, and a really good tutorial.
And here’s a close up look at this shortcrust pastry used for the base of the great Aussie Meat Pie. It’s so beautiful, we almost forgot there was filling underneath. Nine Minutes of Pie InspirationThere are some very strange pies in this one.
This is because one the pie is filled, the base doesn’t cook through properly if it is in the oven for less than 30 minutes. If you really like the scalloped pie edge, you’re going to love the imprinted pie crust because it follows the same easy process. You can give your pie a more rustic look by pressing the tines of a fork or the whisk of a mini whipper around the edge of the pie crust. This is similar in technique to a classic crimp, but even more impressive-looking. To make a rope crimp, use both of your index fingers. With your fingers parallel to one another, press a portion of the dough between them so that it stands up some in the middle and flattens down some on either side.
Since you’re covering a larger area, you can use almost any size cookie cutters you like. Roll your extra dough out thinly and cut out shapes with your cutters. If you find they’re sticking, give them a quick dusting with flowers. If you want to add extra detail, like veins in leaves or definition in shapes like pumpkins, use a sharp knife to add indentations. To create the rope, make a fist with one hand and press your thumb at an angle into the pastry. Pinch some of the pastry between your thumb and index finger.
It’s crucial to handle the dough gently and minimally. This recipe and tutorial was originally published in 2015 and re-published in 2019 with updated video. You can save the dough and roll out again to make more leaves.


No comments:
Post a Comment